Qt QML Type TableModel
Encapsulates a simple table model.
- columnCount : int
- rowCount : int
- rows : object
- appendRow(object row)
- clear()
- variant data(QModelIndex index, string role)
- object getRow(int rowIndex)
- QModelIndex index(int row, int column)
- insertRow(int rowIndex, object row)
- moveRow(int fromRowIndex, int toRowIndex, int rows)
- removeRow(int rowIndex, int rows)
- bool setData(QModelIndex index, string role, variant value)
- setRow(int rowIndex, object row)
The TableModel type stores JavaScript/JSON objects as data for a table model that can be used with TableView. It is intended to support very simple models without requiring the creation of a custom QAbstractTableModel subclass in C++.
import QtQuick
import QtQuick.Controls
import Qt.labs.qmlmodels
Page {
TableView {
anchors.fill: parent
columnSpacing: 1
rowSpacing: 1
boundsBehavior: Flickable.StopAtBounds
model: TableModel {
TableModelColumn { display: "checked" }
TableModelColumn { display: "amount" }
TableModelColumn { display: "fruitType" }
TableModelColumn { display: "fruitName" }
TableModelColumn { display: "fruitPrice" }
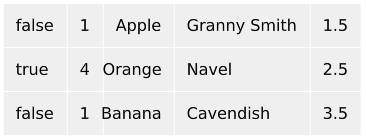
// Each row is one type of fruit that can be ordered
rows: [
{
// Each property is one cell/column.
checked: false,
amount: 1,
fruitType: "Apple",
fruitName: "Granny Smith",
fruitPrice: 1.50
},
{
checked: true,
amount: 4,
fruitType: "Orange",
fruitName: "Navel",
fruitPrice: 2.50
},
{
checked: false,
amount: 1,
fruitType: "Banana",
fruitName: "Cavendish",
fruitPrice: 3.50
}
]
}
delegate: TextInput {
text: model.display
padding: 12
selectByMouse: true
onAccepted: model.display = text
Rectangle {
anchors.fill: parent
color: "#efefef"
z: -1
}
}
}
}You can Try it Online!
The model's initial row data is set with either the rows property or by calling appendRow(). Each column in the model is specified by declaring a TableModelColumn instance, where the order of each instance determines its column index. Once the model's Component::completed() signal has been emitted, the columns and roles will have been established and are then fixed for the lifetime of the model.
To access a specific row, the getRow() function can be used. It's also possible to access the model's JavaScript data directly via the rows property, but it is not possible to modify the model data this way.
To add new rows, use appendRow() and insertRow(). To modify existing rows, use setRow(), moveRow(), removeRow(), and clear().
It is also possible to modify the model's data via the delegate, as shown in the example above:
        delegate:  TextInput {
            text: model.display
            padding: 12
            selectByMouse: true

            onAccepted: model.display = text

            [Rectangle](https://doc.qt.io/qt-6/qml-qtquick-rectangle.html) {
                anchors.fill: parent
                color: "#efefef"
                z: -1
            }
        }
If the type of the data at the modified role does not match the type of the data that is set, it will be automatically converted via QVariant.
For most real-world use cases, it is recommended to use DelegateChooser as the delegate of a TableView that uses TableModel. This allows you to use specific roles in the relevant delegates. For example, the snippet above can be rewritten to use DelegateChooser like so:

import QtQuick
import QtQuick.Controls
import Qt.labs.qmlmodels

Page {
    TableView {
        anchors.fill: parent
        columnSpacing: 1
        rowSpacing: 1
        boundsBehavior: Flickable.StopAtBounds

        model: TableModel {
            TableModelColumn { display: "checked" }
            TableModelColumn { display: "amount" }
            TableModelColumn { display: "fruitType" }
            TableModelColumn { display: "fruitName" }
            TableModelColumn { display: "fruitPrice" }

            // Each row is one type of fruit that can be ordered
            rows: [
                {
                    // Each property is one cell/column.
                    checked: false,
                    amount: 1,
                    fruitType: "Apple",
                    fruitName: "Granny Smith",
                    fruitPrice: 1.50
                },
                {
                    checked: true,
                    amount: 4,
                    fruitType: "Orange",
                    fruitName: "Navel",
                    fruitPrice: 2.50
                },
                {
                    checked: false,
                    amount: 1,
                    fruitType: "Banana",
                    fruitName: "Cavendish",
                    fruitPrice: 3.50
                }
            ]
        }
        delegate: DelegateChooser {
            DelegateChoice {
                column: 0
                delegate: CheckBox {
                    checked: model.display
                    onToggled: model.display = checked
                }
            }
            DelegateChoice {
                column: 1
                delegate: SpinBox {
                    value: model.display
                    onValueModified: model.display = value
                }
            }
            DelegateChoice {
                delegate: TextField {
                    text: model.display
                    selectByMouse: true
                    implicitWidth: 140
                    onAccepted: model.display = text
                }
            }
        }
    }
}
You can Try it Online!
The most specific delegates are declared first: the columns at index 0 and 1 have bool and integer data types, so they use a CheckBox and SpinBox, respectively. The remaining columns can simply use a TextField, and so that delegate is declared last as a fallback.
See also TableModelColumn, TableView, and QAbstractTableModel.
https://doc.qt.io/qt-6/qml-qt-labs-qmlmodels-tablemodel.html#using-delegatechooser-with-tablemodel