A brief coding exercise to demonstrate conditional statements...
Table of Contents
Create a new Cloud9 workspace:
-
From your Cloud9 Dashboard, find in the upper left corner and click the green button, "Create New Workspace". Select "Clone From URL".
-
In the "Source URL" form input, copy and paste in the following URL:
https://github.com/OperationSpark/conditional-statements.git -
In the environment selection box, select "Node".
-
Click the green button "Create".
-
Once the workspace is completed (while spooling up, you'll see a spinning gear on the newly created workspace in the sidebar), click the green button, "Start Editing".
-
Now, when the workspace is loaded, select the command-line in the bottom window pane, and enter the command
npm install, then pressEnter, like this:
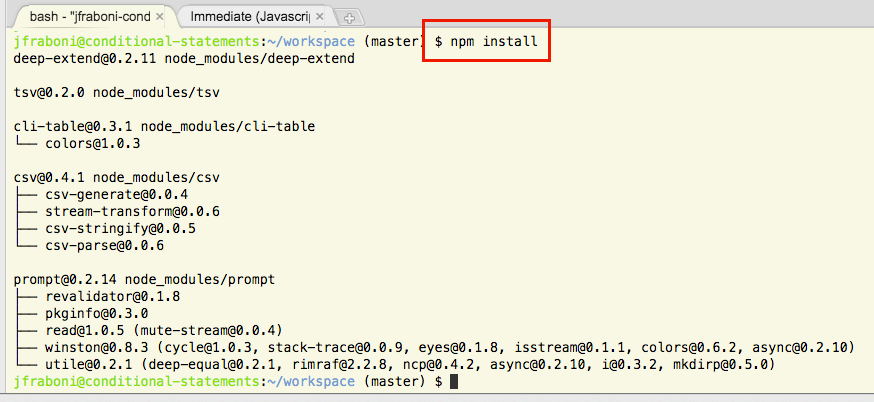
You'll see some test flying by on the command-line as some required files are installed... and...
Nice, you're in business...
###if else and their friends
We'll be making a simple guessing game to demonstrate the power of conditional statements, like the if ...else and switch statements.
For our game, we'll select a random number between 0 and 100 and give the player a limited number of turns to guess the correct number.
Based on the user's input, we'll make decisions using conditional statements to:
- Evaluate whether or not the user has guessed the answer correctly.
- If not, give the user a tip as to whether the answer is higher or lower than their last guess.
- Finally, check the number of turns taken: if the user has reached the maximum allowed turns, they'll be notified they lost the game, and the app will quit. Otherwise, the user will be given another turn.
And just for a better user experience (UX), we'll add a main menu so we can:
- give the user a choice at startup to play or quit.
- return to the main menu after playing a game.
Alrighty, let's get to it...
Open up the file at:
app.js
Because we want to focus mostly on using conditional statements, and in the interest of saving time, we've set some things up for you in this exercise: You'll see at the top of the file, we've included the Node shebang, imported the view module, and declared a few variables to be used by the app.
Our view.js module is a utility that allows us to create menus on the fly. The menus enable us to prompt users for input, and to listen for a userInput event so we can handle and respond to user input.
Ok, let's get busy with a switch statement to process the user's selection from our game's main menu:
// ... other code

// TODO 1 : Create a switch case to process the main menu input //
switch (input) {
    case 'q':
        console.log('Thanks for playing Operation Spark\'s guessing game! Bye bye!');
        process.exit(0);
        break;
    case 's':
        start(7);
        break;
}

// ... other code
Great, here we've created a switch that switches-on the input we've received from the main menu. We create a case to handle the String 'q', for the case that the user wants to exit the game (process.exit(0) is a Node.js method for exiting apps), and another case to handle the string 's', which signifies the user wants to start the game.
Nice, you've used a switch!
Ok, for interest sake, let's get you to write the code that will generate our random number between 0 and 100, just in case you want to use such a feature in your own games (hint, hint!).
Find TODO 2 and enter this code:
// other code ...

// TODO 2 : generate a random number between 0 and 100 //
_answer = Math.floor(101 * Math.random());

// other code ...
This little piece of code relies on the built-in Math library of Javascript to generate a random number between 0 and 100. We provide the value 101 because Math.random() will generate a random floating point Number between 0 and .999 repeat, so multiplied by 101, we'll max out at a value somewhere above 100, but never 101. We then use Math.floor() to shave-off the floating point.
Let's try our random number generator (you can try this in the Immediate pane at the bottom of the (the Javascript REPL): So, for the lower end of our range we want to include 0, so with a random number of 0.004462211159989238, we get:

Ok, how about for our upper range?
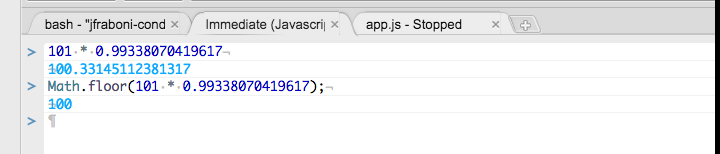
Dig? Ok, let's run the app!
Run the App!
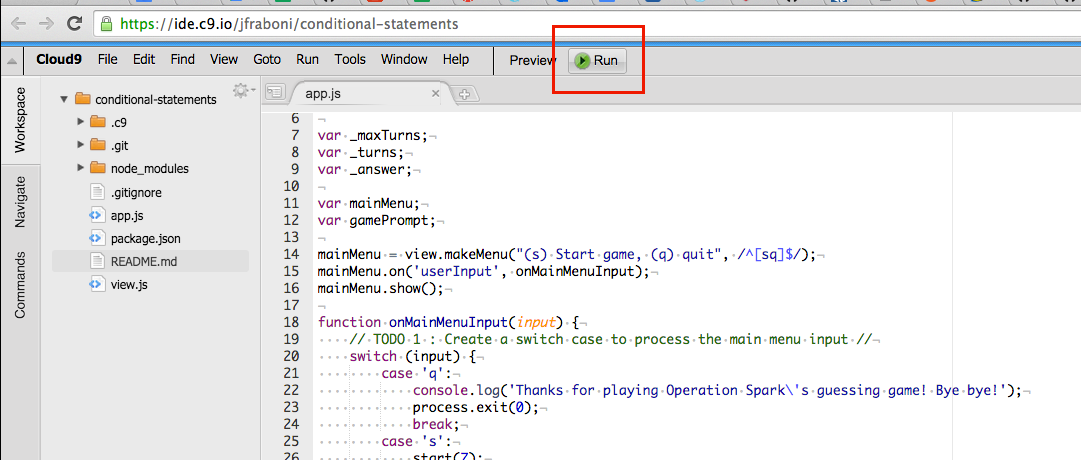
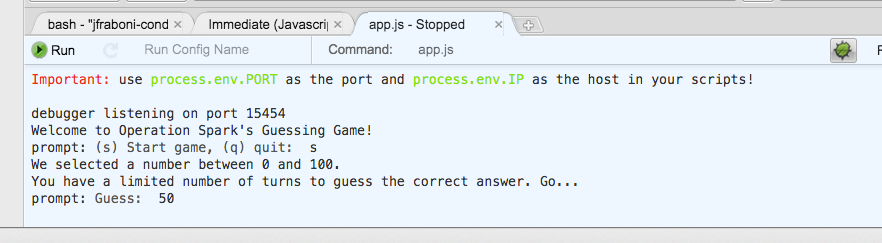
Awesome, when you click on the Run button, our app will open up in its own command-line window pane at the bottom of the Cloud9 IDE.
You've built a nice little menu; you can quit the app and start the game. But if you try playing the game, nothing much happens:
Let's code the logic of our guessing game using our friend, the if ...else-if ...else statement...
// other code ...

// TODO 3 : use if ...else-if ...else to process the game prompt input //
var feedback;
if (input === _answer) {
    console.log('Bingo, you guessed it, the answer is %d.  GAME OVER!', _answer);
    return endGame();
} else if (input > _answer) {
    feedback = 'Lower...';
} else {
    feedback = 'Higher...';
}

// other code ...
Here, we're using the logic of the if ...else-if ...else statement to process the user's guess.
In the first if statement, if the user guessed correctly, we print a congratulatory message, then call the function endGame(), which ends the game by taking the user back to the main menu.
Else, if the user did not answer correctly, in our else-if statement, we check if the user's guess is greater than the answer, and provide the feedback 'Lower...' to the user.
Finally, in our trailing else statement, we know by default from the above statements that the answer must be greater than the user's guess, so we set the feedback variable to 'Higher...'.
Now that we know the state of the user's last guess, let's either allow them to take another turn, if they have any turns left:
// other code ...

// TODO 4: use if ...else to do next turn only if there's a remaining turn //
if (_turns.push(input) < _maxTurns) {
    doNextTurn(input, feedback);
} else {
    console.log('You\'ve reached the maximum number of turns: GAME OVER!');
    endGame();
}

// other code ...
Again, leaning on the conditional if ...else statement, we push the user's last guess, stored in the input variable, into the _turns Array. Conveniently, on pushing new items into an Array, the push method of the Array returns the new length of the Array. So, from this value, we can check if the number of turns taken by the user is less than the allowed turns. If it is, we allow the user to continue playing, if not, we bail by telling the user they've reached the maximum number of turns, and return them to the main menu by calling endGame().
Run the App!
This time, and to run the app any other time, use the Run button on the Console View pane at the bottom of the screen, see here:
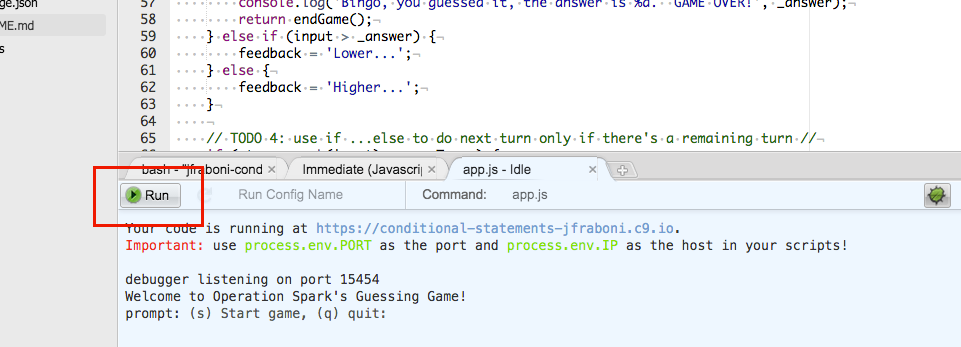
Smokin', we got ourselves a game! And, you got to flex your conditional statements muscles! Well done!