1.1 Getting Started

- Navigate in stori.es using tabs.
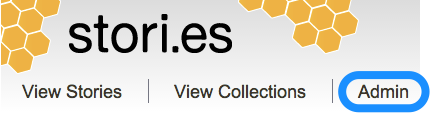
At the top of the page, you see tabs that allow you to navigate through the platform:
-
View Stories. Click here to work with your organization's individual stories.
-
View Collections. Access collections of stories and the questionnaires used to collect stories. Collections are groups of stories that have something in common. By default, stori.es groups all responses from a questionnaire together. You can also create custom collections to group your organization’s stories.
What is the Admin tab? If you are an administrative user for your organization, you see an additional tab: Admin. The Admin tab lets you perform administrative tasks for your organization, such as creating a new user account or updating your organization’s information.
- Manage your account.
In the upper right corner, you see your username, your organization name, and the Sign out link.

You can click your username (in the example above, michelle) to change your password or make other updates to your user profile.
Click Sign out to exit the stori.es platform.
If you work with more than one organization in the stori.es platform, you can click the arrow next to the organization name to see a menu of your organizations and select the one you currently want to view.

If you work with only one organization in stori.es, this field simply displays your organization’s name.

- View stori.es content. Underneath the navigation tabs, the body of each page displays the content you have currently chosen to view.

It is open by default when you sign in. Individual messages can be selectively deleted by clicking the x on the right of the message row. You can minimize the tray by clicking anywhere on the header, resize it by dragging the top, or remove it completely by clicking the x on the tray's header.
- Support and legal information. At the bottom of the page, there are four links:
- Privacy Policy. Click to learn more about how your privacy is protected when working with stori.es
- Terms of Service. Click to read the rules all users agree to abide by when working with the stori.es platform.
- Software as Service Agreement. Click to read the legal contract all users enter into when working with the stori.es platform.
- Support. Click to get help with the stori.es platform. You can ask your question by phone, email, chat, Twitter, or by completing a web form.
If you are in doubt about whether or not to contact stori.es support, we recommend you reach out!
The first step in collecting stories is creating and publishing a questionnaire.
Questionnaires are online forms you design using the stori.es questionnaire builder. The questionnaire builder is a simple, user-friendly tool, so anyone with any level of technical knowledge can build and publish a request for stories quickly!
Click here to see an example of a questionnaire.
Follow the steps below to learn to build a basic questionnaire.
The simplest way to create a new questionnaire is to:
-
Go to View Collections.
-
Click the New Questionnaire button.
-
Give your questionnaire a title. Tip: You can change the title at any time! You also have the option to write a short description for the questionnaire in the Summary field.The Summary is not required.
-
Select a language from the Language field dropdown menu.
-
Click Create. The questionnaire detail opens.
-
Click the Builder toggle button at the top of the page to open the questionnaire builder:

At the top of the builder view there are three tabs: Questions/Content (selected by default), On Submit, and Publication. Questions/Content is where you create your questionnaire by selecting and arranging builder blocks to make up your questionnaire.
-
Select a Theme to determine what your questionnaire will look like in terms of visual elements like colors, logos and font choices. The themes in the menu have been customized specifically for your organization; there may be only one option to choose from.
-
An example text content block appears underneath the Theme menu. When you hover over the builder block area, the block turns gray; you see a pencil icon (
 ) on the left edge of the block.
Click the pencil icon to edit this block to add a title and leading text that briefly describes the overall subject matter and what you'd like people to do. (You can select and delete the existing example text just as you would in a word processing application.)
Builder blocks are editable! Learn more.
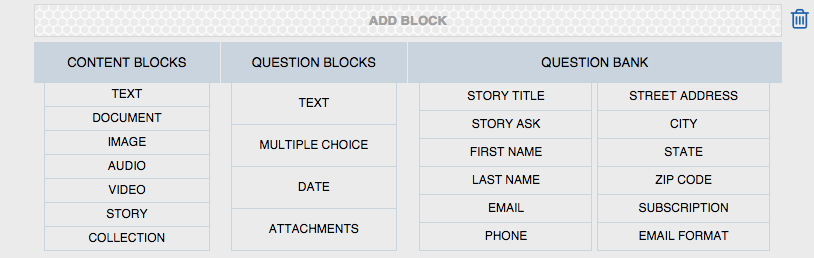
- The menu block is shown by default anytime you create a new questionnaire. You use this block to choose the questions and supporting content that will appear in your questionnaire. Learn more.
Tip: If it is hidden, you can always access the menu block by clicking the + (plus sign) that appears after each block:

First, you’ll add a Story Ask to your questionnaire. A Story Ask provides storytellers with an editable text field, like a word processor, to type in the story narrative. Click the Story Ask in the Question Bank menu.

The Story Ask builder block appears in edit mode. By default, when you add any new block to the questionnaire, it displays in edit mode. You can make changes to the default text displayed, but for the purposes of this simple questionnaire, leave the text as is.
Click the Done button at the bottom left of the block to close the block's edit mode.

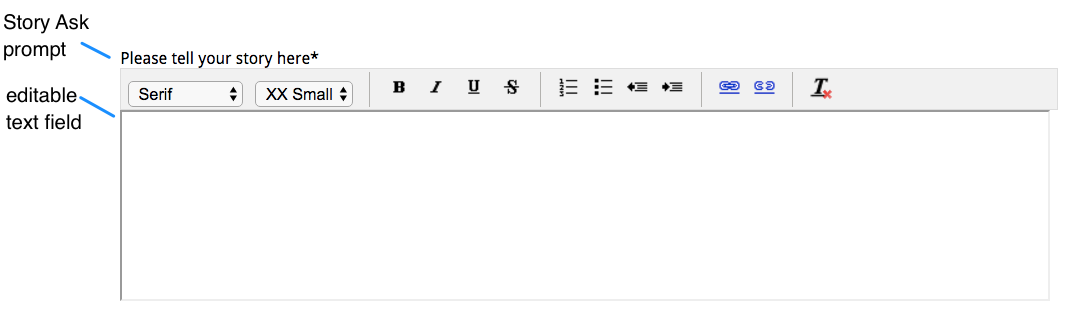
The Story Ask prompt appears and below it, the editable text field where your storytellers provide an answer. The prompt is the question you are asking your storytellers. By default it says Please tell your story here.
- The Permissions text block appears near the end of the questionnaire, immediately before the Submit Button block. Permissions language lets storytellers know how your organization will use the information they share in stori.es. The text has legal implications. Learn more.
For this simple questionnaire, leave the text as it is. - Now click the Preview button to see what the questionnaire will look like to your storytellers! The questionnaire preview is displayed in a new tab. Tip: Leave the Preview tab open and click your browser’s Refresh button whenever you make a change to easily test your updates.

- In addition to including a place for storytellers to provide a story, you probably want to collect some contact information from the storyteller. To do this, open the builder block menu again by clicking the + (plus sign) that appears after the Story Ask. In the Question Bank, you see a list of contact information builder blocks to choose from:
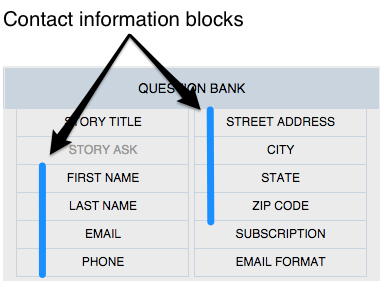
To keep this questionnaire simple, add the following blocks: First Name, Last Name, City and Zip Code.
13. Finally, you may want to send periodic communications and updates to your storytellers. The last two options in the Standard menu let the storyteller indicate preferences for emails sent by your organization.
Subscription gives storytellers the option to check a box to indicate they would like to receive email from your organization.
Email Format gives storytellers the option to receive emails from your organization as either plain text or rich text.
Add one or both blocks to your questionnaire now.
Builder blocks are draggable. A feature of the questionnaire builder is the ability to drag builder blocks from one area of the page to another to customize the question order. (For example, it’s recommended you place the permissions text at the end of your questionnaire, immediately before the Submit Button block.) To do this:
a. Click the to make the block editable.
b. Click on the block header and drag this item to change the order. The header appears as a honeycomb pattern:

You can also rearrange the blocks using the movement controls.
- Click the Preview button again to see what your questionnaire looks like after adding these blocks. Great job! You have now created a basic questionnaire. Learn how to publish your questionnaire and begin gathering stories.