1.2.4 The Collection and Questionnaire Details
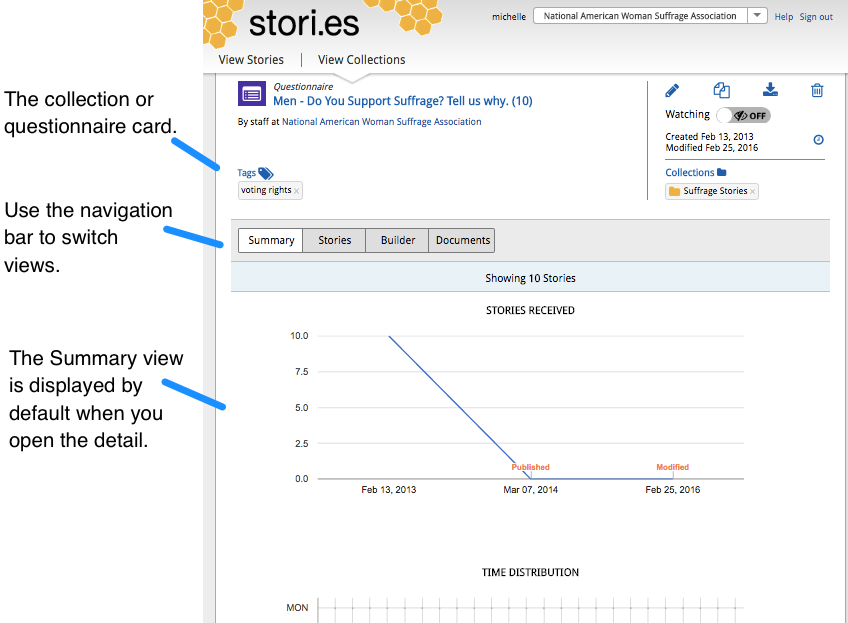
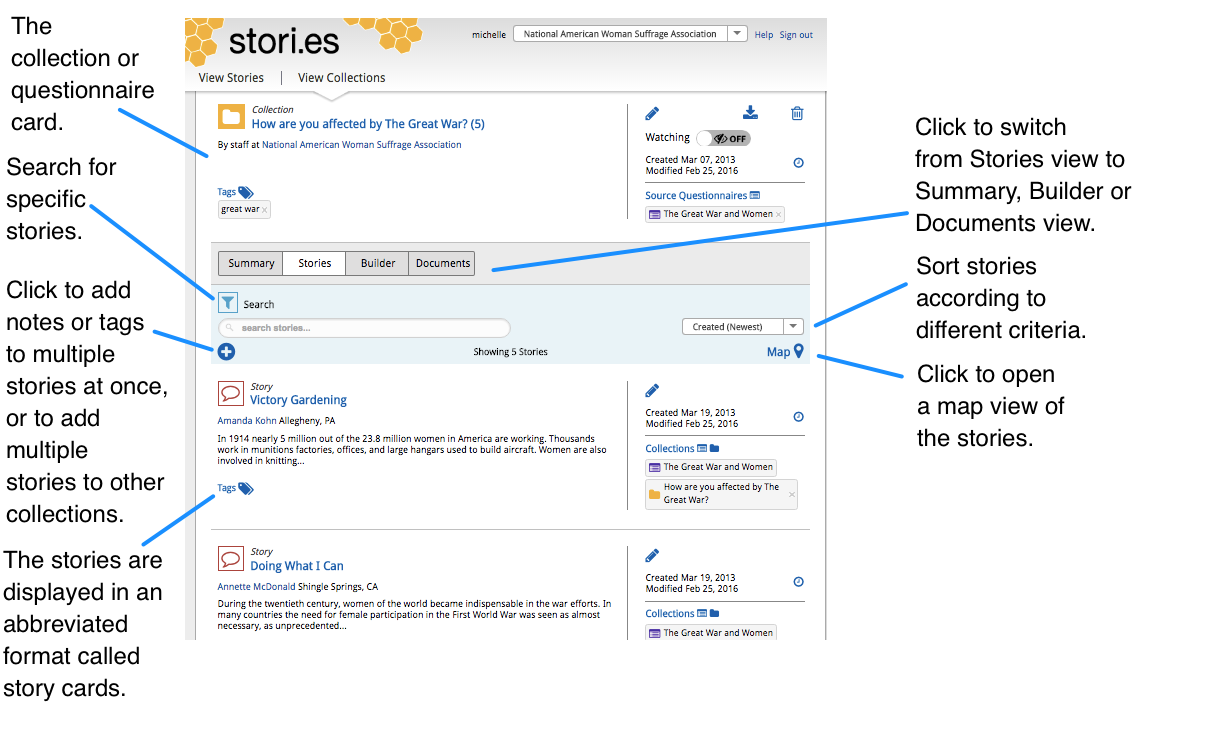
When you open a collection or questionnaire detail page, you see the card, an abbreviated version of the detail, at the top of the page. Below the card, the navigation bar lets you switch views to access the Summary, Stories, Builder and Documents views.
By default, the Summary view is selected.
Learn more about the different views:
- Summary is a group of charts that presents information about the collection or questionnaire's stories in a visual context.
- Stories view lets you see, search and curate all the stories in the collection or received in response to the questionnaire.
-
Builder view on the collection detail is where you customize and publish collections in preparation for embedding them on external websites.
For questionnaires, it's the tool you use to create the online forms storytellers complete to share information with your organization. - Documents displays any notes and attachments associated with the collection or questionnaire. It also lets you view and edit the questionnaire's confirmation page. You can also add new notes or attachments in this view.
The Summary view includes three charts that present information about the collection or questionnaire's stories in a visual context. Observing the charts, you can quickly learn:
- how many stories have been submitted over the lifetime of the collection or questionnaire.
- which times of day and days of the week most stories are submitted.
- which areas of the country the stories come from, in a map view.
Note: If a collection or questionnaire is newly created or has not yet been published, the following message is displayed:
No summary information yet! Once someone has submitted a story to your questionnaire, this view provides summary information and graphs describing the performance of your questionnaire. If you haven't published your questionnaire yet, once you are ready you can publish it from the Builder view. The images below can give you sense of what the summary information will look like.
Elements of the Summary View
- Story Count
- Stories Received chart
- Time Distribution chart
- [Geographic Distribution] (https://github.com/stori-es/stori_es/wiki/1.2.4--The-Collection-and-Questionnaire-Details#geographic-distribution) chart
Shows the number of stories in the collection or submitted via the questionnaire.
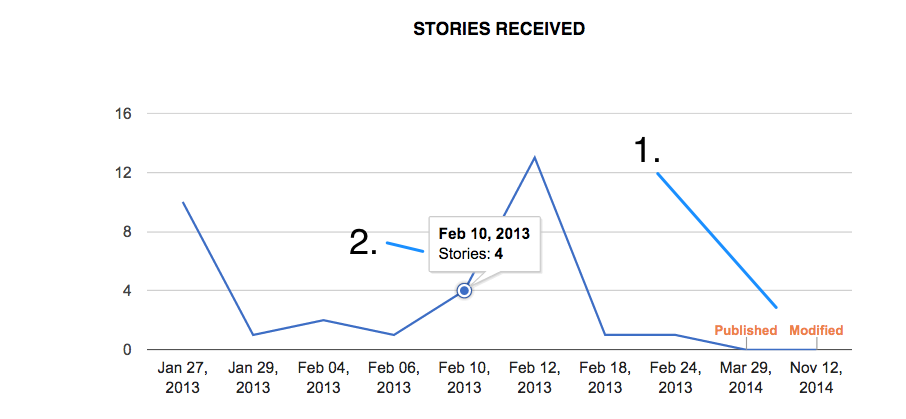
A timeline that shows you the number of stories received, from the creation date to the current date.
-
Hover over the Published and Modified indicators to view the exact time and date the collection or questionnaire was published or modified. The Timeline displays the latest modified date and published date. Note: If a collection or questionnaire is in Draft mode, the chart does not display a Published indicator. If the latest modified and published dates are the same, only the Published date indicator displays.
-
Hover over the chart's line to see the number of stories submitted on a specific day. When a story is submitted, it displays on the summary timelines of the questionnaire and any associated collections. Note: If a story is added to a collection via the platform itself (using bulk add, for example) it does not affect the timeline of that collection.
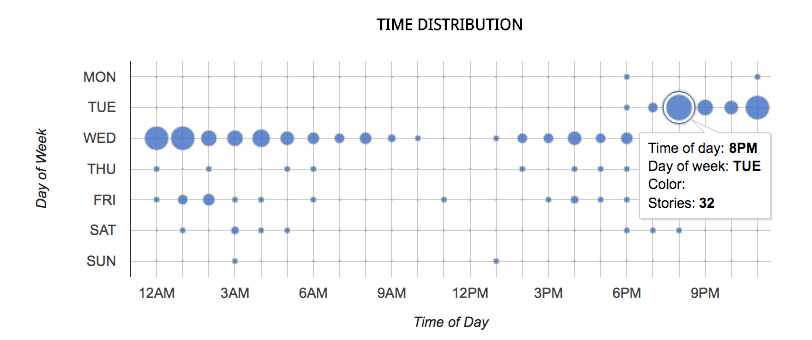
Shows the times of day and week most stories were initially submitted.
-
Bubbles represent the number of stories submitted for each hour of each day of the week. The bigger the bubble, the more stories were submitted during that time of the day/week.
-
Hover over a bubble to view the number of stories submitted to the questionnaire at a certain time of day and week.
Tip: The days of the week are represented by three-letter abbreviations:
MON – Monday
TUE – Tuesday
WED – Wednesday
THU – Thursday
FRI – Friday
SAT – Saturday
SUN –Sunday
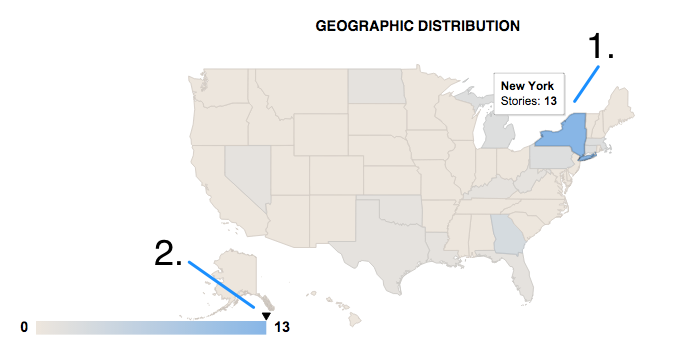
Shows the distribution of stories by state. The state's color indicates the number of stories submitted – with the most stories submitted by the brightest blue states and the fewest stories submitted by the lightest grey states.
-
Hover over a state to view the state's name and the number of stories submitted from that state.
-
The legend at the bottom of the map shows the smallest to largest number of stories submitted by each state. When you hover over a state on the map, a black arrow appears on the legend that shows where that state's submitted story count is relative to the story count of the state that submitted the most stories.
Note: The Geographic Distribution chart can only display stories for which location information is provided.
The Stories view shows you the story cards for all the stories in the collection or received in response to the questionnaire. You can search for stories and open a map view to see the collection or questionnaire’s regional trends at a glance. The Stories view also provides tools to help you curate your collection.
From this page you can:
- View, sort and search all the stories.
- Add tags and notes to the stories.
- Add multiple stories to collections in one bulk action, enabling you to curate stories efficiently.
Elements of the Stories View
- Collection and Questionnaire Card
- Navigation Bar
- Search
- Sort Dropdown
- Bulk Add Icon
- Map View
- Story Cards
- Page Navigation
An abbreviated version of the collection or questionnaire, called the card, appears at the top of the detail. Tip: Click on the title to close the detail view and return to View Collections.

Click to switch from Stories view to Summary, Builder or Documents view.

Underneath the title, search for specific stories within the collection. Learn more about using Search.
Tip: When you perform a search, once the search is complete you see the number of stories currently displayed in response to the criteria you entered.

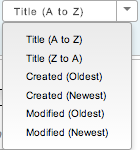
Sort stories according to different criteria: alphabetically by Title or chronologically by Created or Modified date. By default the stories display chronologically.

Click to add notes or tags to multiple stories at once, or to quickly add multiple stories to other collections. Learn more.

Click to open a map with markers for all the stories in the collection or submitted to the questionnaire. Quickly search for stories by location and identify regional trends. Learn more about using map view.
The stories are displayed in an abbreviated format called story cards.

Use these controls to navigate through the pages of story cards.
The collection builder is where you customize and publish collections in preparation for embedding them on external websites.
The questionnaire builder is the tool you use to create the online forms storytellers complete to share information with your organization. Design your questionnaire to collect targeted information by selecting and rearranging readymade questions. Set a questionnaire's status to Published once you are ready to share it with potential storytellers and the general public.
Click the Documents button on the Navigation bar to view and edit the questionnaire's confirmation page and any associated notes and attachments. You can also add new notes or attachments.
Elements of the Documents View
 )- Confirmation
This card automatically appears as a document when you create a new questionnaire. Whenever a storyteller submits a response to your questionnaire, by default, the stori.es platform displays a message to confirm that the story has been received. The default message reads Thank you for sharing your story with us. You can use this card to customize the message displayed to storytellers, as well as add media (text, images, and audio and video clips) and embed documents, stories or entire collections.
Tip: You also have the option to redirect storytellers to a webpage immediately after they have clicked Submit to send you the story, instead.
To customize the confirmation page of your questionnaire:
-
Click the Edit icon (
 ) on the right side of the card. The edit window opens. The Pencil icon turns yellow to let you know the card is in edit mode. The Title and Summary fields are now in edit mode. You can enter the changes you'd like to make.
 -
The Save icon (
 ) lets you save your changes without closing the edit mode of the content card. Tip: Changes to the confirmation page are live immediately!
Click Done to save your changes and close the edit window.
Cancel closes the edit window without saving any changes.
To add media (text, images, and audio and video clips) as well as embed documents, stories or entire collections in the published questionnaire, open the content card's builder view. To open the builder:
- Click in the Content header:

- Access the menu block by clicking the + (plus sign) that appears after each block:

Select and edit the content block(s) you want to include on the confirmation page.
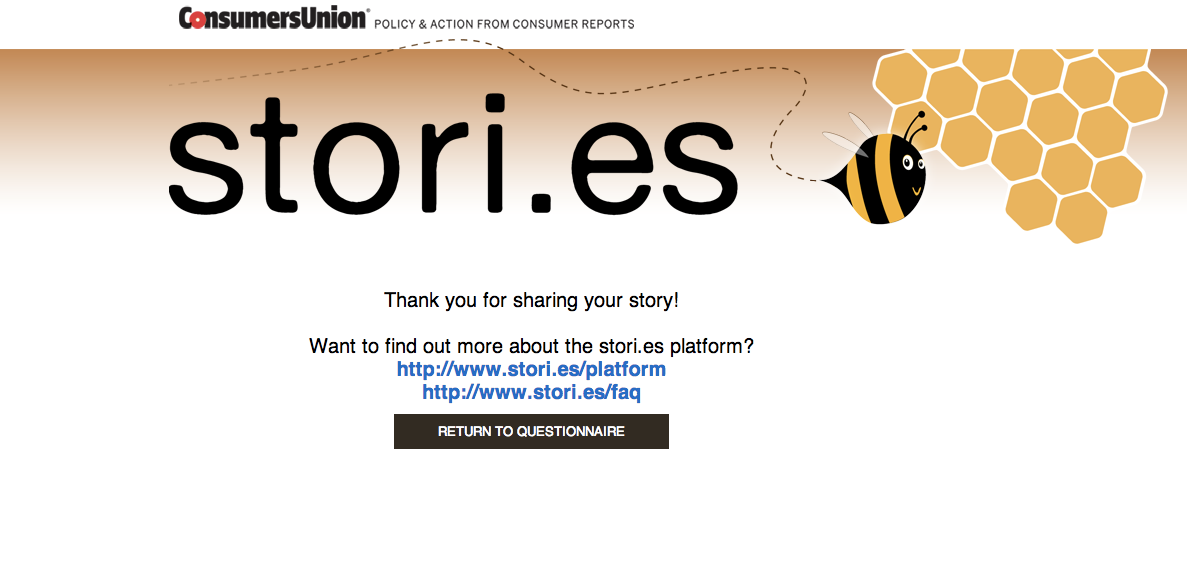
About the Confirmation Page. It's the page that a storyteller sees immediately after submitting a story. Its basic purpose is to give the storyteller a message confirming you have received the story. By default the page displays a "thank you" message as well as a button the storyteller can click to return to a new instance of the questionnaire.
Depending on your goals, you can use this page in a variety of ways. For example:
- include a customized thank you in the message text
- direct storytellers to a website by including a link
- suggest next steps or additional action to take
- include information that helps storytellers learn more about your organization
Here's an example confirmation page:

View and edit any notes added by your organization. The name of the person who created the note is displayed. You can click on the name to go to the person's detail page. The note's Created/Modified information also appears on the card. Tip: Notes are viewable by anyone in your organization with access to stori.es but are not visible to storytellers. Currently, once a note is added, it can be edited but not deleted.
To edit the note:
- Click the Edit icon (). The edit window opens. The Title and Summary fields are now in edit mode. You can enter the changes you'd like to make.
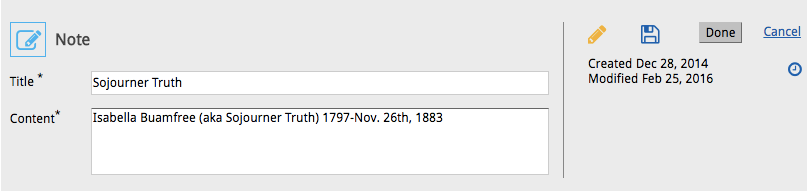
- The Pencil icon (
 ) is now yellow to let you know the card is in edit mode.
The Save icon () lets you save your changes without closing the edit mode of the note card.
Click Done to save your changes and close the edit window.
Cancel closes the edit window without saving any changes.

Link to a URL, and edit the link. You can see who added the attachment and click the name to view the person's detail page. The attachment's Created/Modified information also appears on the card.
Whenever you create a new questionnaire, a Redirect Attachment card is created.

This card lets you specify a URL to display to storytellers immediately after they have submitted a story. Tip: You have the option to choose whether to redirect storytellers to a webpage immediately after they have clicked Submit to send you the story, or to display a confirmation message to storytellers instead. You indicate this choice in the Submit building block. Specify the URL to which you would like storytellers to be redirected the same way you edit any attachment card (explained directly below). By default, the redirect is consumersunion.org. Tip: You can edit the title field of this attachment just like any other attachment card. However, keep in mind that if you change the title to something other than Redirect, you may not be able to distinguish it from other attachment cards.
To edit the attachment:
-
Click the Edit icon (
). The edit window opens. The Title and URL fields are now in edit mode. You can enter the changes you'd like to make. Note that the attachment must have a valid web address (URL). -
The Pencil icon (
) is now yellow to let you know the card is in edit mode.
The Save icon () lets you save your changes without closing the edit mode of the note card.
Click Done to save your changes and close the edit window.
Cancel closes the edit window without saving any changes.
####Add a New Document
To add a new document detail page:
-
Click the
 and select the type of document you want to add: Note or Attachment.
 -
Select Add Note to open an editable note card window. Type in a title for the note. Type the note itself in the Summary text box. Click Create to publish the new note card.
Select Add Attachment to open an editable attachment card window. Type in a title for the attachment. In the URL field, paste or type the URL you want to link to. Note that the attachment must have a web address (URL). Click Create to publish the new attachment.
Tip: Cancel closes the new note or attachment card window without saving or publishing the new document.